 |
|
|
|
| 05-05-2016 10:07:55 |
 Onderwerp: How to Rip and Convert Redbox DVDs Onderwerp: How to Rip and Convert Redbox DVDs |
lauralily520
Geregistreerd op: 29 Mrt 2016
Berichten: 74
|
|
 |
|
In this article, we will tech you how to rent a Redbox movie, and own it forever. (Of course, you can do it with only personal use, not for commercial use.
Want to have all your favorite Redbox DVDs saved on your computer so that you can watch later or transfer them to your portable devices like iPad Air, iPhone 5S, Samsung Galaxy Tab 3, etc. If so, you've come to the right place. This article simply shows you how to rip Redbox DVD to video files for amusement with ease. (Of course, you can do it with only personal use, not for commercial use.)
To get the work done, all you need is a professional DVD ripping software that can convert Redbox DVD to video/audio bypassing the DVD copy protection. The best program I can recommend for copying Redbox DVD is Brorsoft DVD Ripper, which can help you rip Redbox DVD to video formats like MP4, MOV, AVI, WMV, MKV, FLV, etc. with high quality and fast speed. If you are a Mac user, you can use the equivalent Brorsoft Mac DVD ripper to convert Redbox DVD on Mac (Lion and Mountain Lion included). Now just download this Redbox DVD Ripper and follow the guide to accomplish your task.
How to rip Redbox DVD easily and fast
The below guide uses DVD Ripper for Windows screenshots to illustrate how to convert Redbox DVD to video/audio. The method to rip Redbox DVD on Mac is almost the same. Just make sure you have got the right version.
1. Import Rebox DVD movies
After downloading, install and run the program. As you can see, you can add the DVD movies you want to rip by clicking the "DVD disc" button on the main interface.
2. Choose output format
Click "Format" bar to get the format list and select a proper export format. As you can see, various regular video formats like MP4, MOV, MKV, FLV, WMV, AVI, etc. are available in the "Common Video" profile.
Tips:
a. Brorsoft DVD Ripper provides 100+ video presets for Google Nexus, Asus Transformer, Galaxy Tab, iPad, Apple TV, Galaxy S4, Nook HD and more, allowing you to convert DVD movies to fit your different portable media players.
b. If you just want to copy DVD to DVD folder with original structures, please go to 'How to Backup DVD with Original Structure'.
c. If you just want to copy main movie without extras, commentary etc. documents, please go to 'How to Copy Movie Only from DVD discs'.
3. Start ripping Redbox DVD movies
When the settings are done, go back to the main interface and click the "Convert" button to begin converting Redbox DVD to video/audio. The software will do the rest for you automatically and there will be a progress bar showing you how long it will take. When the conversion finishes, click "Open" to find the ripped Redbox movies and play them anywhere you like.
More Topics:
Play Tivo Shows on Plex Media Server smoothly
Convert Tivo recordings to Android video format
How to import MOV to Pinnacle Studio 15/16/17.5
Losslessly Backup and Rip Blu-ray to MKV Format
Compress 4K/1080P ProRes to DaVinci Resolve 12/11
Convert MTS/MXF files for After Effects CS4/CS5/CS6
Converting Canon XA25 AVCHD/MP4 to Apple ProRes
How to backup DVD movies with CloneDVD alternative
Rip DVD videos to PowerPoint Making DVD Presentation
Convert Blu-ray Disk Movie to MP4/MOV on Mac lossless
Convert Apple ProRes media to DNxHD For Avid MC on Mac
Import 4K/1080P Prores MOV file to Premiere Pro CC/CS6/CS5
Solving Problems with GoPro (4K) video and Premiere Elements
Simple Guide : Convert and Import DJI Phantom 3 4K to FCP 7/X
Editing GoPro Hero4 Session 4K MP4 Footage in Adobe Premiere
Import Nikon D5300 H.264 MOV file to Premiere Pro CC, CS6/CS5/CS4
Edit Sony XDCAM MXF/MP4 files in FCP 7/X with ProRes MOV format
Source: How to rip Redbox DVD easily and fast |
|
| Terug naar boven |
|
| 06-05-2016 10:27:39 |
Onderwerp: |
lauralily520
Geregistreerd op: 29 Mrt 2016
Berichten: 74
|
|
|
|
This is an instructional article on showing how to share and upload DVD/Blu-ray to iCloud Drive on Mac by ripping DVD/Blu-ray to iCloud compatible video format.
iCloud Drive: What is iCloud Drive?
It's part of iCloud - Apple's cloud storage service that launched in 2011.
iCloud Drive lets you save photos, videos, documents, music, and app data to iCloud. Not only does it let you store all your stuff in one place, but it lets you access all of your files and data from your iOS device, Mac, and Windows PC, and then keep those files and folders up to date across all your devices. It even allows you to create new files and folders from iCloud-enabled apps and work on the same file across multiple apps. Simples.
Why do We Copy DVD to iCloud Drive?
Below content shows you where you may need a iCloud Drive rather than a DVD disc.
1. Computer has no DVD drive or DVD drive is broken or damaged. You need iCloud Drive to play back DVD movies.
2. Transfer DVD movies via iCloud Drive, especially DVD movie folder and ISO image files. From one computer to another with absence of DVD drive.
3. Save DVD content onto iCloud Drive for storage. Make a backup of DVD movie collections with large capacity iCloud Drive.
4. Play DVD movies via iCloud Drive on Macs, iPads, iPhones, iPods, Apple TVs as long as you login in iTunes more conveniently.
How can We Upload DVD to iCloud Drive?
For your knowledge, most commercial DVDs are protected by strict DVD copy protections so that users can't easily copy DVD movies. In addition, DVD is beyond the compatibility of iCloud Drive. In other words, to upload DVD content to iCloud Drive, you'd better rip and convert DVD to iCloud Drive friendly format initially. For this sake, this article aims to offer 3 methods for helping you rip DVD to iCloud Drive on Mac so that you can watch DVD movies on your iCloud Drive supported devices.
First method:
Download Handbrake
Guide: How to Download DVD Movies to iCloud on Mac
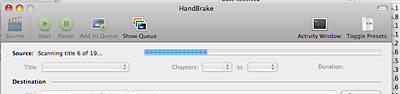
Step 1. Install and launch Handbrake, and then load your DVD movies.
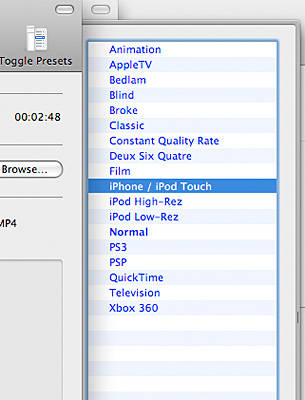
Step 2. You may notice the sidebar on the right, and then you may click the video format that you want to convert.
Step 3. Choose an output destination to store your converted files and you can also customize title of your video.

Step 4. Open iTunes and login your ID and password. Then you can put your converted movies to your account. iCloud will sync them automatically. Then you can open you iPhone, iPod, iPad and login in iTunes, click on the iCloud icon to download DVD movies to iCloud.
Have issues with Handbrake on Mac, turn to an Handbrake alternative instead.
Second method:
Tools Required:
iTunes on Macbook
iSquint
Guide: How to Convert DVD to iCloud on Mac?
Step 1. Then get the DVD you want to add to your iPod and insert it into your computer. If you have set your DVD player application to open automatically when you insert a DVD, it will probably open. Quit it.
Step 2. To find a target to store your files, click the "change" button at the bottom of the iSquint window.
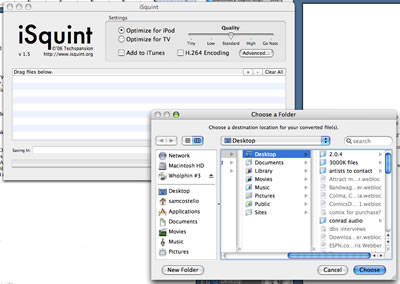
Step 3. Next, locate the file you want iSquint to convert. To do this, navigate through the finder. Once you've selected these options, click the "Start" button att he bottom of the window.
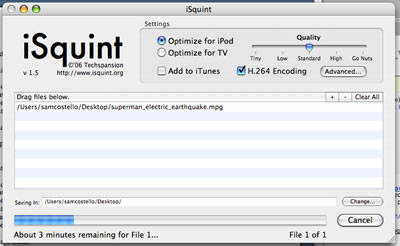
Step 4. Open iTunes and login your iTunes account. Load your converted movies to iTunes and then choose to sync automatically. Then you can open iTunes on iPhone, and download your movies freely.
Third Method:
To copy DVD to iCloud Drive without sacrificing video quality and much precious time, Brorsoft DVD Ripper for Mac comes to your rescue. The program provides good quality output regardless of the end device that you are going to use. It can convert DVD to iCloud supported QuickTime MOV or MP4 in simple steps. Besides, the program also provides many optimized presets for almost all Apple devices including iPad Pro, iPad Mini 4/3/2, iPad Air, iPhone 6S, iPhone 5S, iPod Touch 5, Apple TV, etc. Whats more, you can crop the black bars, add special video effects, split or merge videos, etc. as you like with the built-in editor.
If you are a Windows user, please turn to the Windows version here. Now download the right version of the program and follow the guide below.
How to rip DVD to iCloud Drive friendly video for uploading
Step 1. Load DVD movies
Insert the DVD disc into your computers DVD drive and run the Mac DVD to iCloud converter. You can click the Load DVD button to load the DVD files to the program. DVD ISO/IFO, VIDEO_TS folder are supported also.

Step 2. Output settings
Click Format to select an output format. You can either choose MP4, MOV as the output format or select the icon of a iDevice like iPad to get videos with optimized settings.
Step 3. Tweak video and audio settings
Click Settings icon, it lets you make adjustments to the video settings. For example, lowering the frame rate can help reduce the file size. You'd better keep the balance of your video quality and video size.
Step 4. Start ripping DVD on Mac
Click "Convert" button to start ripping DVD movie to digital video on Mac OS X. After conversion, click "Open" to find converted video for storing on iCloud Drive at your will.
Thats all! When the conversion is finished, you can log on your iCloud and transfer the converted DVD files to iCloud smoothly.
More Topics:
Guide on Editing TS files in iMovie
Play Tivo Shows on Plex Media Server smoothly
Open M2TS files on Windows Movie Maker Editing
Editing Sony F5/F55 XAVC in Avid Media Composer
iMovie won't import Nikon D5/D500 4K MOV footage
Transcode C300 MK ii 4K MXF files to Edit in FCP X
Fix JVC MOD and Pinnacle Studio incompatiblity issues
Converting Canon EOS 70D video to FCE, iMovie, FCP
Convert MTS/MXF files for After Effects CS4/CS5/CS6
Rip DVD videos to PowerPoint Making DVD Presentation
Load Canon C300 Mark II 4k footage to Editable in FCP 7
Convert Blu-ray Disk Movie to MP4/MOV on Mac lossless
Natively Edit Canon C300 Mark II 4k MXF in Final Cut Pro 7
Take 4k XF-AVC MXF files off from Canon C300 MK II to FCP
Solving Problems with GoPro (4K) video and Premiere Elements
Tips for Editing MTS in Windows Movie Maker on Windows 10
Import MTS files from Sony/Canon/JVC/Panasonic to Davinci Resolve
Use DJI Phantom 3 4K MOV Files in Windows Movie Maker (Wins 10)
Import Nikon D5300 H.264 MOV file to Premiere Pro CC, CS6/CS5/CS4
Edit Sony XDCAM MXF/MP4 files in FCP 7/X with ProRes MOV format
Source: Guide: How to Download DVD Movies to iCloud on Mac |
|
| Terug naar boven |
|
Vorige onderwerp
Volgende onderwerp
|
Je mag geen nieuwe onderwerpen plaatsen in dit subforum
Je mag geen reacties plaatsen in dit subforum
Je mag je berichten niet bewerken in dit subforum
Je mag je berichten niet verwijderen in dit subforum
Je mag niet stemmen in polls in dit subforum
|
Wilt u geen reclame op dit forum en genieten van extra voordelen? Klik dan vlug hier voor meer informatie!
|


